Violin books can be scandalously expensive. However, remember that inter-library loan is a thing. The librarians at our military post library are so great -- in addition to knowing all my kids' names and handing out noisemaker toys in the summer reading program (did your librarian ever give your kids a cowbell? I think not) -- they got pretty excited for the chance track down rare books.
These are the books on my hunting list:
Making a Simple Violin and Viola by Ronald Robertson. (This is a specialty book about trapezoidal instruments.)
The Art of Violin making by Chris Johnson and Roy Courtnall.
Violin making step by step Henry Strobel.
Violin-Making a practical guide by Juliet Barker (This one is really cheap enough to buy -- $20 used on Amazon right now.)
Friday, October 21, 2016
Toddler Cello Strings/ Octave Violin test
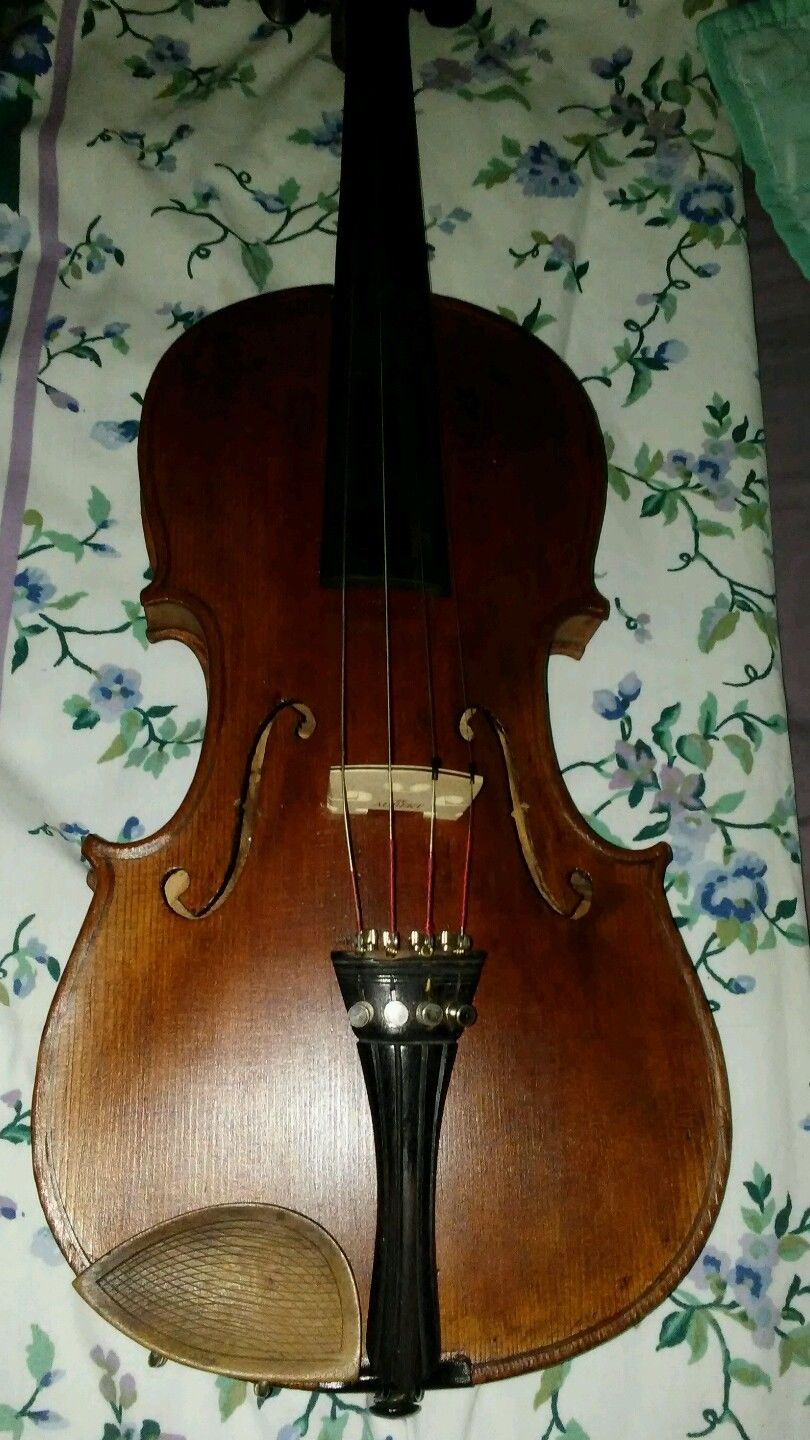
When my 1/8 cello strings came in the mail, I was so excited I spent the evening testing them on my regular violin. It is an unusually poor candidate for an octave violin setup because the neck is sunken, but I was interested in a benchmark to measure the effect of my changes to the standard, which are numerous although individually small in degree.
There are purpose-built octave strings (Sensicore Octave sold by Southwest Strings) but they are about $50 - and the C string if you want to go full chin cello is $20 by itself. Steep for an experiment. I found Prelude 1/8 cello strings on eBay for $9 from someone who didn't mean to order toddler size cello strings. A 1/8 cello is bigger than a violin, but for that price I figured I could make it work.
Right off the bat, there were mechanical difficulties in winding such a fat gauge of string. I had to trim off 8 inches or so of string - all the winding. I used viola fine tuners because violin ones can't fit that diameter of loop, and bored out the string hole on a new peg significantly. My normal pegbox was not deep enough to accommodate the gauge of the C-string at all. Even the octave G was tough to wind in such a tight radius. It did not want to bend enough grip the tiny peg.
However, at last I fudged it enough to play a bit.
My flimsy light bow did eke out some sound, but I definitely want a viola or cello bow with some black hair and very sticky rosin. It was a lot of work to get a wispy sound out.
The vibrations to the chin were indeed strong. However, I rarely play more than a half hour at a stretch, and not continuously at that. I'm a lightweight.
The sound was very interesting. I can see why one maker called his octave a "grizzly". You know how a lion's roar has a staccato quality, like you are hearing each individual wavelength peak, rather than one smooth sound? I am not sure how to describe that although there is surely a scientific term for the phenomenon. This shared that growly quality.
Also, the pitch varied significantly with bow pressure. You can force a violin to do this a little -- mash the bow and hear a little rev in the engine. But this was present, to large degree, with every stroke unless I worked hard to keep it artificially even in pressure -- thus the useable length of the bow is short since the tip is too light completely, too great of a contrast. Hopefully a cello bow will reduce this effect or it will be annoying to impossible to play without going off-key.
The bar is set pretty low -- my viola can only be better! If it isn't, I can just string it as a viola.
In which I play a viola
The other weekend, my husband gave me time without the kids to go to a string instrument shop by myself! We have three boys under 4. If you're a parent, you know why that sentence merited an exclamation point. I went in for a $3 adapter for the church sound system and came out wanting a $1200 viola, of course.
First I tried all the violins and a couple bows, curious to compare with my own setup. My world being scarce of other violinists, I have never played anything but my own. The $70 bow felt flabby compared to mine. The $180 bow worked just fine though.
Compared to my restored antique Suzuki, the other violins (from $400 to $1500 or so -- I was trying not to look at prices!) were louder but less sweet and complex in voice, for the most part. They had that French horn quality that is great in a French horn but not to my taste in a violin. I really love the G and D strings on mine, the A is OK, and I pretty much avoid playing on the E. There was one with an exceptionally sweet E string that got my attention. But no magic happened until I picked up a 16-inch viola. I thought the transition to different fingering would be awkward, but it wasn't. It was transcendental. Have you ever had a dream where you can effortlessly sing like an angel, fly like a bird, or swim like a fish? It was like that.
Now I am extra excited for my 3/4 viola/octave violin/chin cello to be finished.
Oil varnish
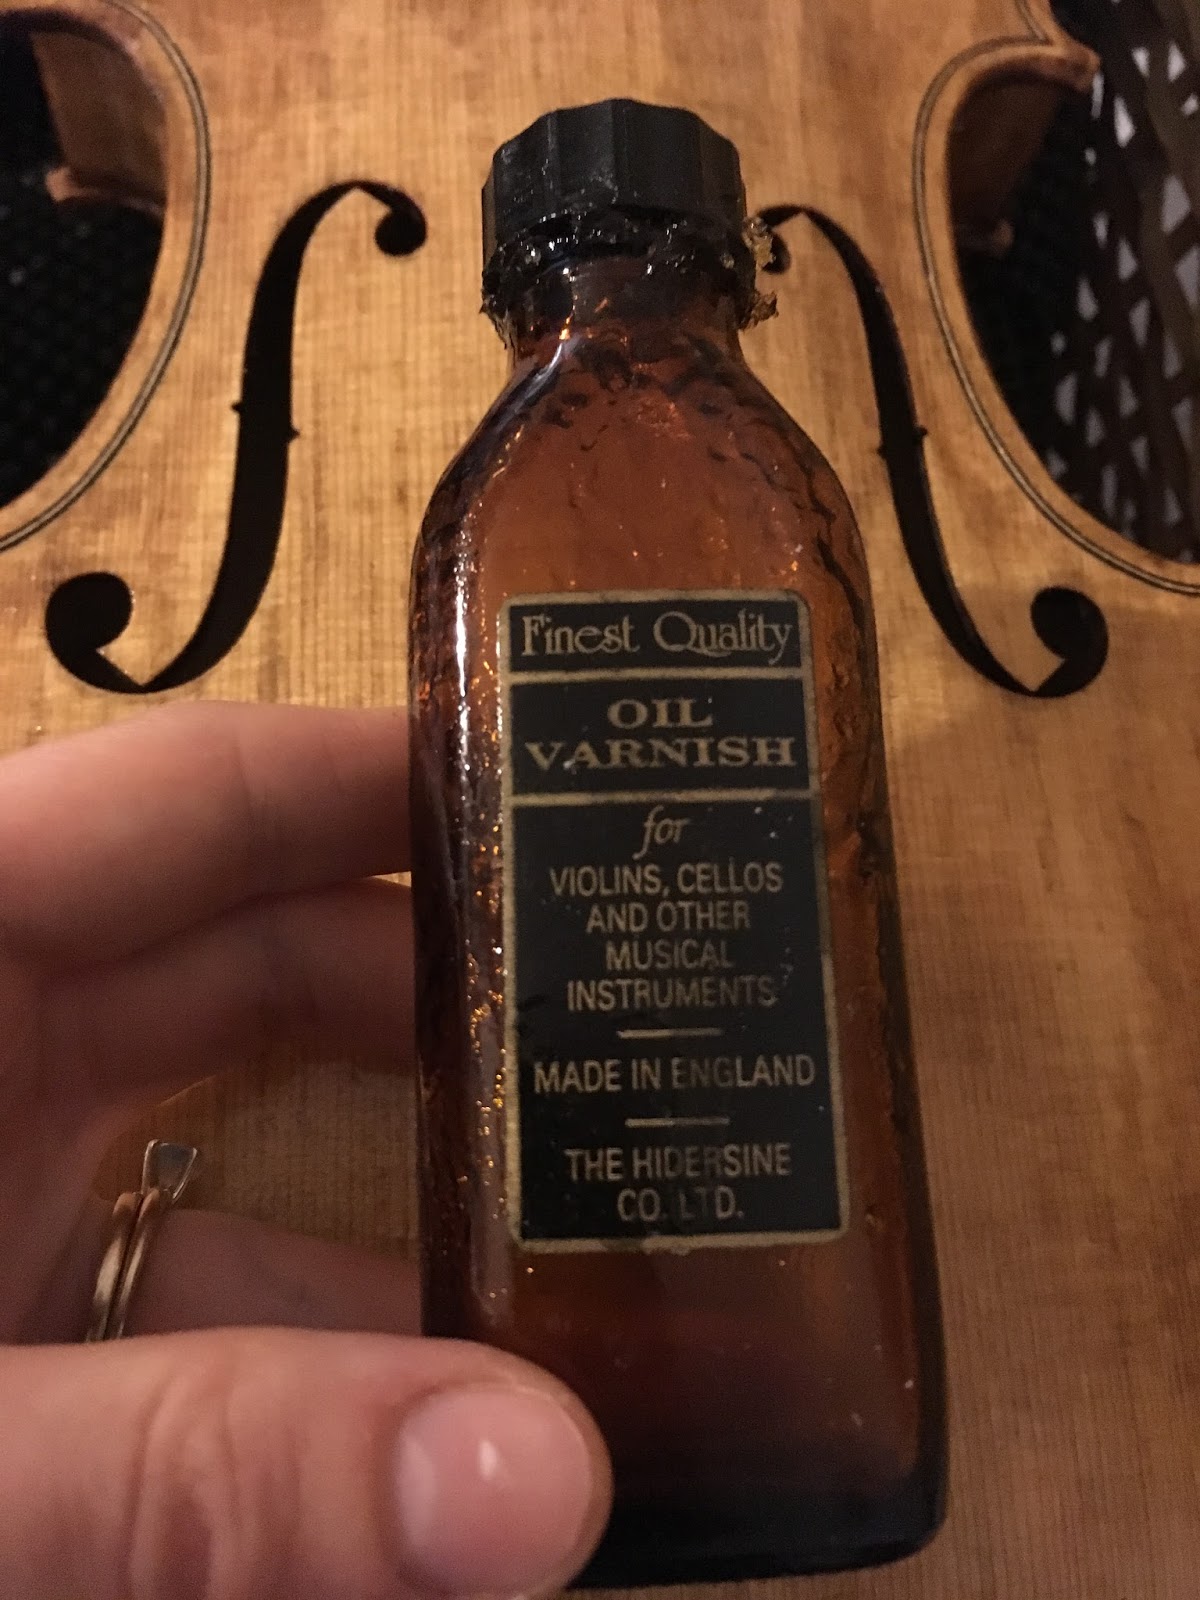 The key to oil varnish, I think, is patience and many thin coats. Last time, I ended up with bubbles, embedded dust, runs, and puddles by applying it full, syrupy strength. This time I thinned every coat by at least half with turpentine; and it was much better. I did about 6 very thin coats applied by an index finger. I would have done more, and may yet, but that little bottle (Hildersine) ran out.
I recommend the tutorial by John Osnes if you want to know how to do it actually properly. http://osnesviolins.com/11.Varnish.htm
In an effort to speed up the cure, I let it get some UV out on the lawn but we don't live in the best neighborhood and I was kind of nervous the whole time it was out sunbathing.

In order to varnish belly, back, ribs, and scroll every time, I suspended it to dry on its endpin and neck. The endpin isn't glued in; I slipped it out to varnish easily around it, then popped it in to dry every time.
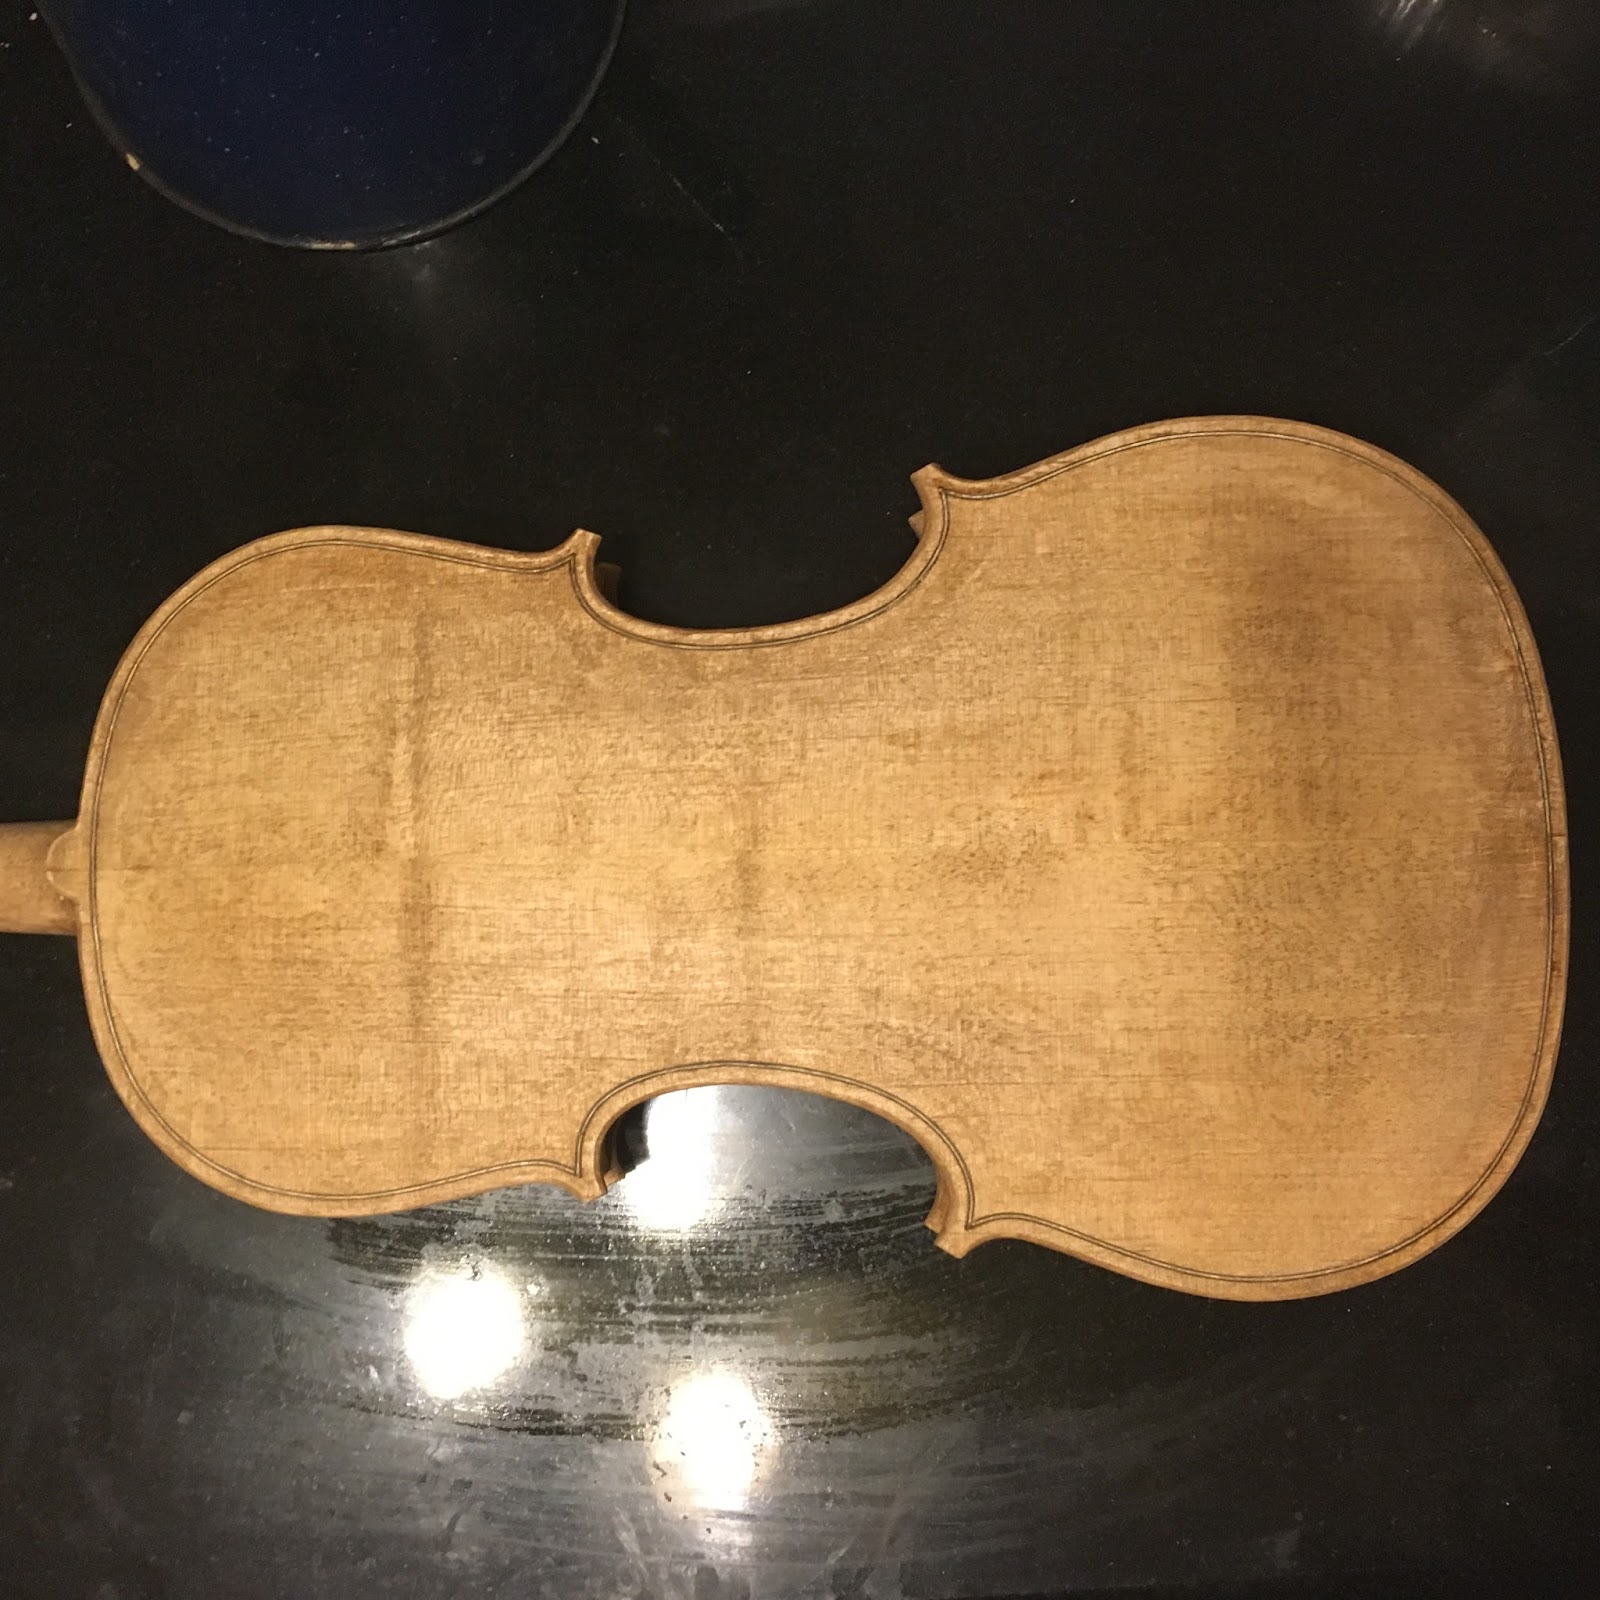
The texture and depth of the varnish is lovely, even not polished yet.
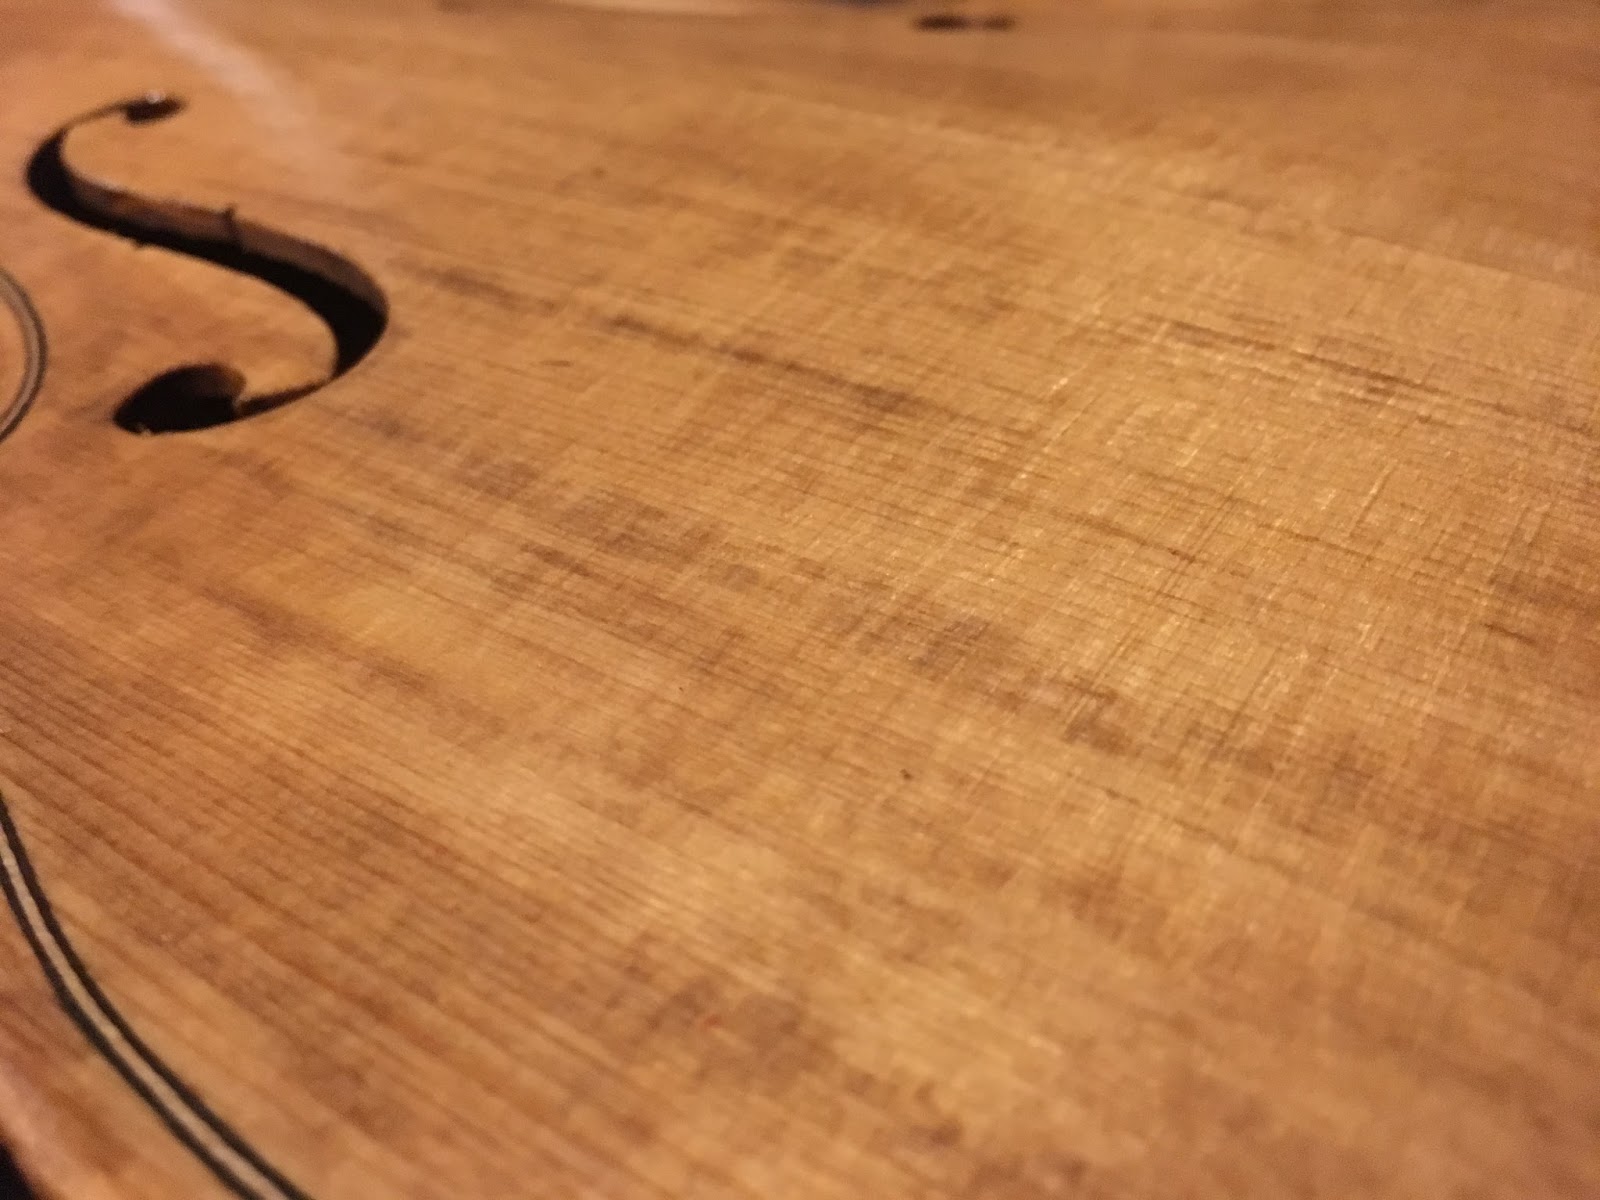
Although not a roaring blaze, it turns out the back has a stray flame or two.

To distract myself from the waiting to cure, I am working on plans for my next projects, which include another violin restoration project for my husband's Christmas present and, after that, some serious branching out -- from-scratch, viola, and cello projects. Posts on those to follow!

Thursday, October 20, 2016
Coffee Stain
The initial goal was a honey colored instrument to contrast with the rosewood fittings. It's hard to coordinate brown with rosewood so I thought this was a safe choice since I don't have a fine degree of control over the shade when I use stuff from the kitchen.
I made a dark cup of espresso and boiled it down till it was sticky and thick. The maple took this treatment well; the spruce did not, because the surface was rougher in some spots than others. I scraped instead of sanding in an effort to preserve the corduroy effect of the raised grain. However, my scraping evidently left much to be desired because the rough spots absorbed much more color than the smooth parts and it ended up looking dirty and awful. It looked more like burnt toast than honey. I panicked and tried to scrub it out with so much water that some seams opened up. Once it dried and my panic subsided, I realized I could sand out and scrape out the dark spots. It still isn't honey, but maybe it looks more like nice toast than the burnt kind.


I made a dark cup of espresso and boiled it down till it was sticky and thick. The maple took this treatment well; the spruce did not, because the surface was rougher in some spots than others. I scraped instead of sanding in an effort to preserve the corduroy effect of the raised grain. However, my scraping evidently left much to be desired because the rough spots absorbed much more color than the smooth parts and it ended up looking dirty and awful. It looked more like burnt toast than honey. I panicked and tried to scrub it out with so much water that some seams opened up. Once it dried and my panic subsided, I realized I could sand out and scrape out the dark spots. It still isn't honey, but maybe it looks more like nice toast than the burnt kind.

Ready for varnish.
Setting the neck
Michael Darnton, in his neck-setting chapter at violinmag.com (which I highly recommend), says that figuring out what to do is almost harder than doing it, and it definitely is.
On maestronet he shared a picture of a gauge he used to judge string angle over bridge while setting the neck. I made one like it and found it extremely helpful. There are many other ways and tools to set the neck, so read about it until you find an explanation that makes sense to you.
All through this build, I have been using the spec sheet at this link from Alan Goldblatt, although actually the viola sheet. In the neck setting section, there are even more measurements than I know what to do with.
http://www.alangoldblatt.com/specs/Violin.pdf
 This diagram represents my understanding of about what a violin neck set should look like, but I'm probably off on a couple things because it didn't all come from one source. I made my action generally taller to accommodate wider gauge strings and the additional room they need to vibrate.
On maestronet they recommended starting at a fairly steep angle to give the violin room to settle. Old violins have sunken necks that require therapeutic lower bridges, but there's no reason to start there. However, it's worth remembering that, as important as this neck set is, you shouldn't freeze with fear to start; you can probably fit a therapeutic bridge if you do mess up. Luthiers do that all the time on old and imperfect instruments. I myself have an antique with a very sunken neck and a very squat bridge to compensate -- at least till I work up the nerve to shim it.

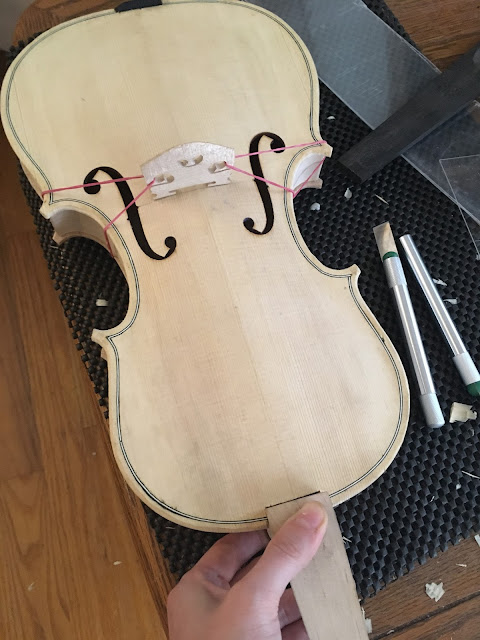
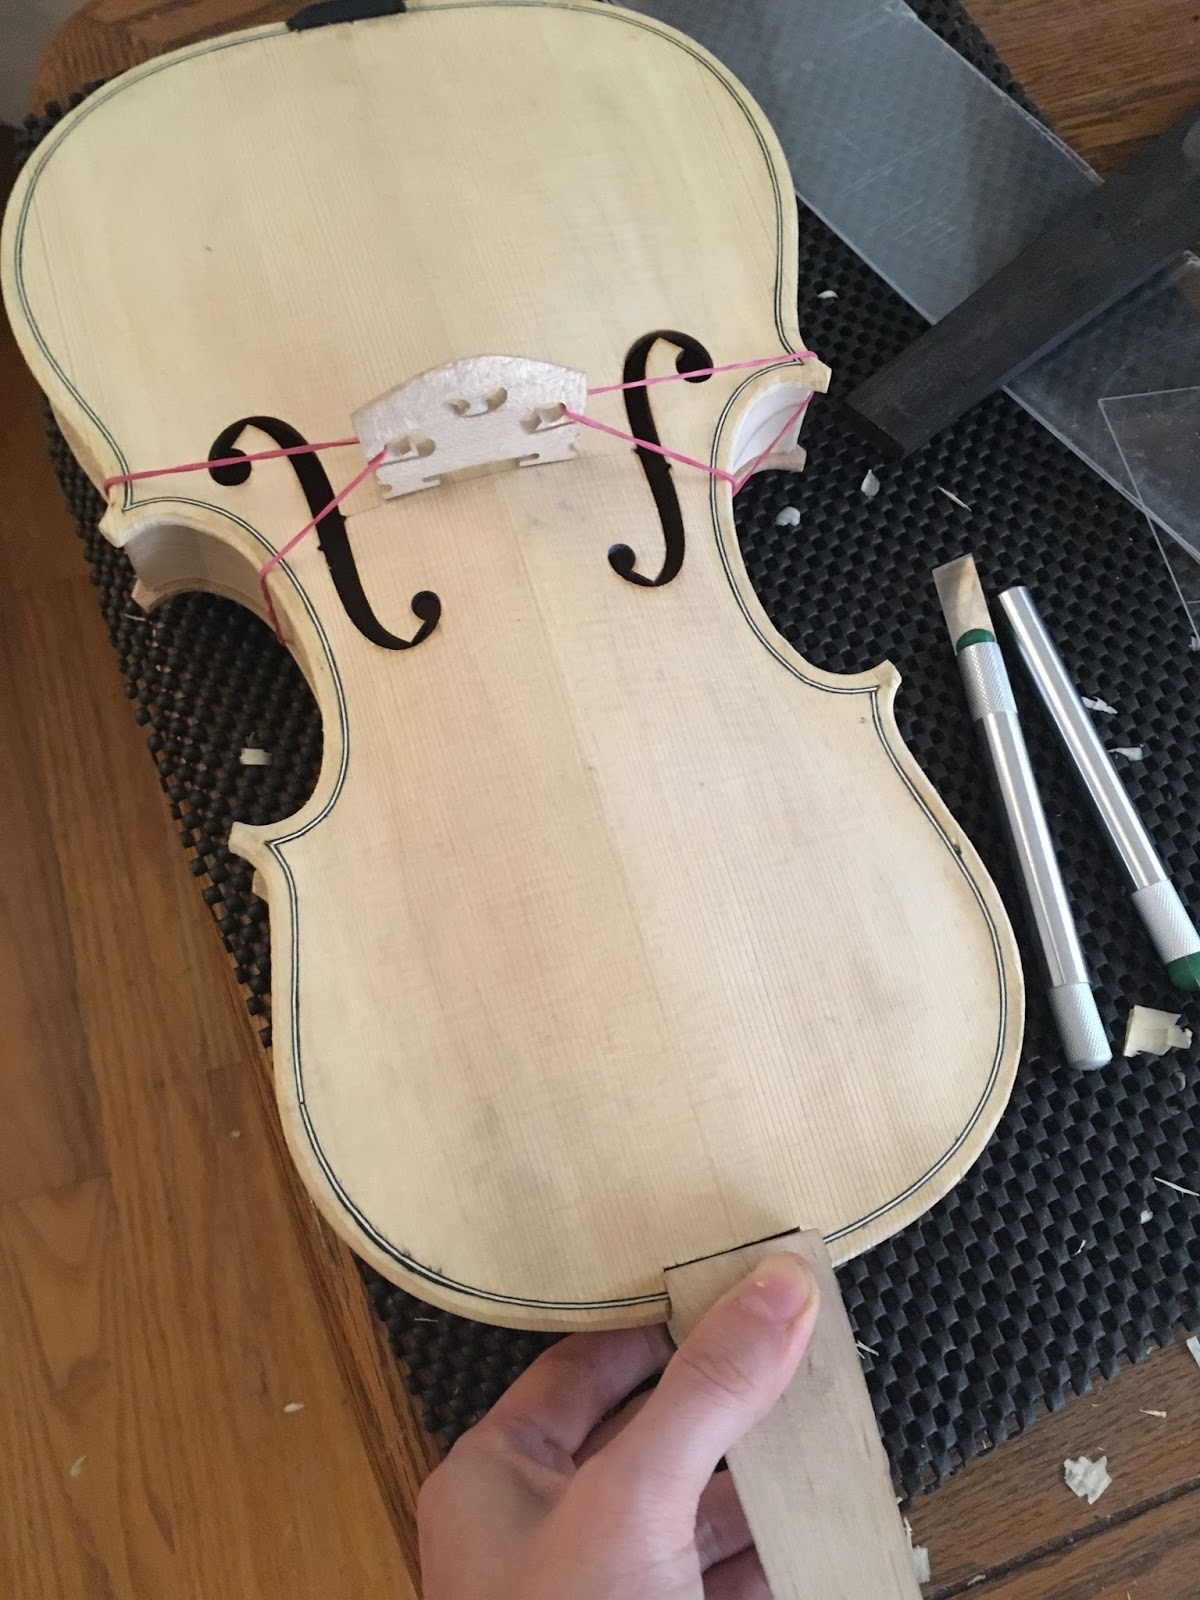
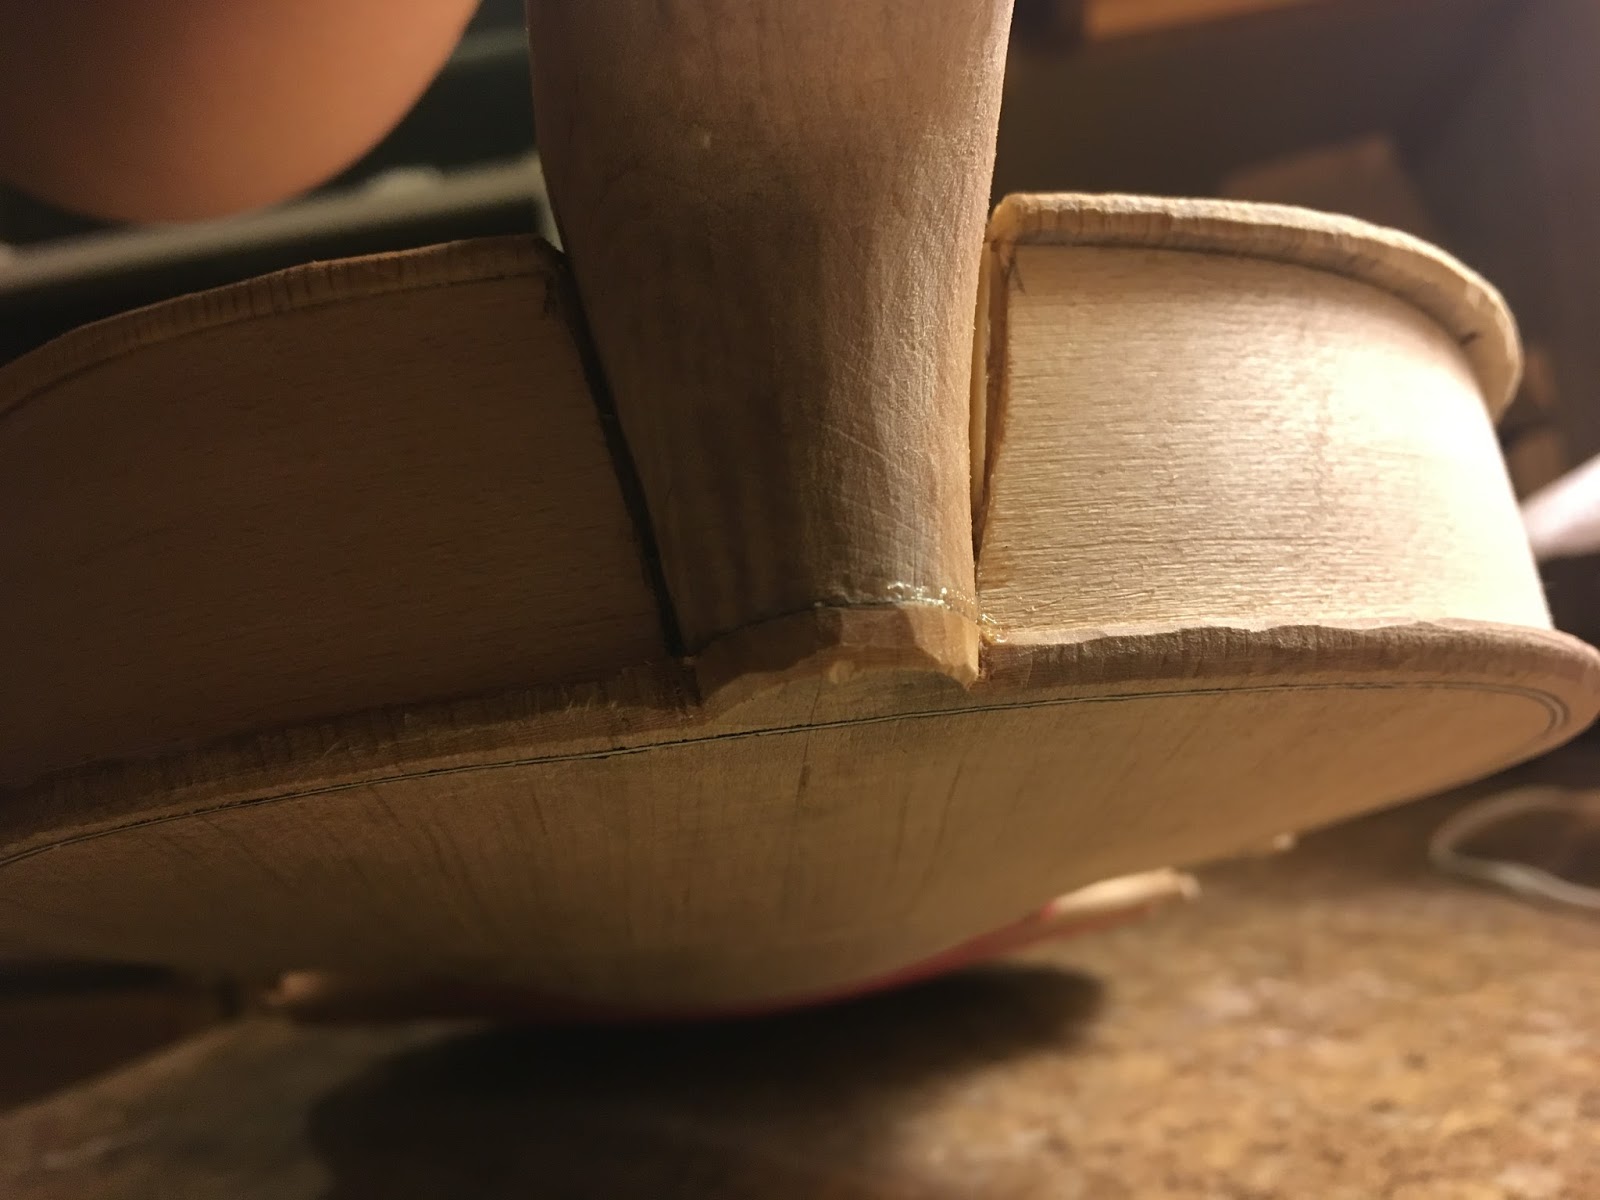
Here is the string angle tool I copied from Mr. Darnton. It worked like a dream. I carved a bridge to standard height and held it in place with a rubber band. (Note: inner f- hole nicks is not necessarily the standard place for the bridge -- I had reasons.) Yes, a properly chalk fitted bridge stands on its own, and mine does that, but there are not enough hands to hold the neck, the fingerboard, the nut, and the string angle tool if the bridge is another moving part too. I taped on the nut and fingerboard but it would be worthwhile to temporarily tack them on with a dab of weak glue; I will next time.
I used chalk fitting on the mortise carving, but ended up cutting the sides too loose and one part of the wall too deep. So I layered in some wood shavings so at least there wouldn't be an air pocket in there. Mr. Darnton writes that the mortise should be tight enough to pick up the violin by the neck when dry-fitted, but not tight enough to swing it around your head -- a colorful turn of phrase but it really does help. But I never carved a mortise of any sort before and my best effort wasn't so great. However, it seems solid once glued even though it isn't pretty. I cut too wide into the ribs before I even started the mortise into the block.


As ugly as my very first mortise looks, it is actually the right angle (vertically at least), and the join feels solid. We're aiming for playability, so, I'm calling it a win. It was close, but I won. You will too.
On maestronet he shared a picture of a gauge he used to judge string angle over bridge while setting the neck. I made one like it and found it extremely helpful. There are many other ways and tools to set the neck, so read about it until you find an explanation that makes sense to you.
All through this build, I have been using the spec sheet at this link from Alan Goldblatt, although actually the viola sheet. In the neck setting section, there are even more measurements than I know what to do with.
http://www.alangoldblatt.com/specs/Violin.pdf

On maestronet they recommended starting at a fairly steep angle to give the violin room to settle. Old violins have sunken necks that require therapeutic lower bridges, but there's no reason to start there. However, it's worth remembering that, as important as this neck set is, you shouldn't freeze with fear to start; you can probably fit a therapeutic bridge if you do mess up. Luthiers do that all the time on old and imperfect instruments. I myself have an antique with a very sunken neck and a very squat bridge to compensate -- at least till I work up the nerve to shim it.
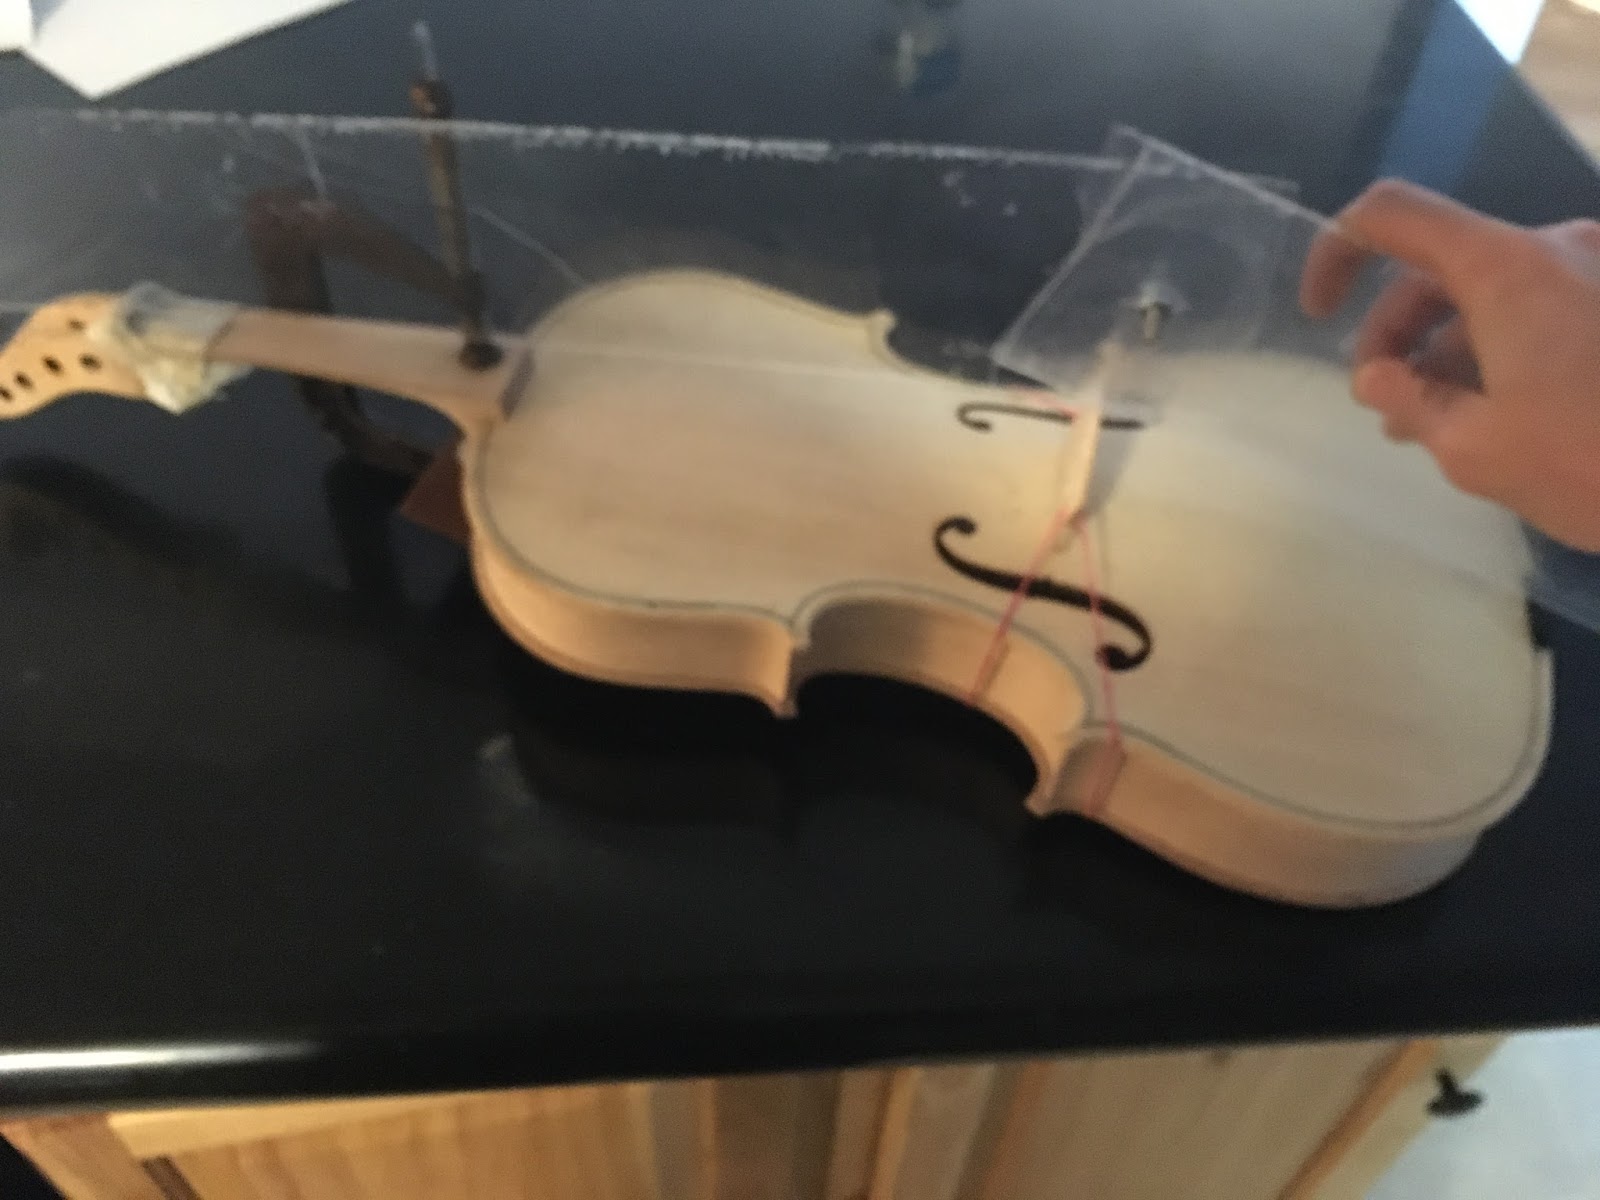
Here is the string angle tool I copied from Mr. Darnton. It worked like a dream. I carved a bridge to standard height and held it in place with a rubber band. (Note: inner f- hole nicks is not necessarily the standard place for the bridge -- I had reasons.) Yes, a properly chalk fitted bridge stands on its own, and mine does that, but there are not enough hands to hold the neck, the fingerboard, the nut, and the string angle tool if the bridge is another moving part too. I taped on the nut and fingerboard but it would be worthwhile to temporarily tack them on with a dab of weak glue; I will next time.
I used chalk fitting on the mortise carving, but ended up cutting the sides too loose and one part of the wall too deep. So I layered in some wood shavings so at least there wouldn't be an air pocket in there. Mr. Darnton writes that the mortise should be tight enough to pick up the violin by the neck when dry-fitted, but not tight enough to swing it around your head -- a colorful turn of phrase but it really does help. But I never carved a mortise of any sort before and my best effort wasn't so great. However, it seems solid once glued even though it isn't pretty. I cut too wide into the ribs before I even started the mortise into the block.
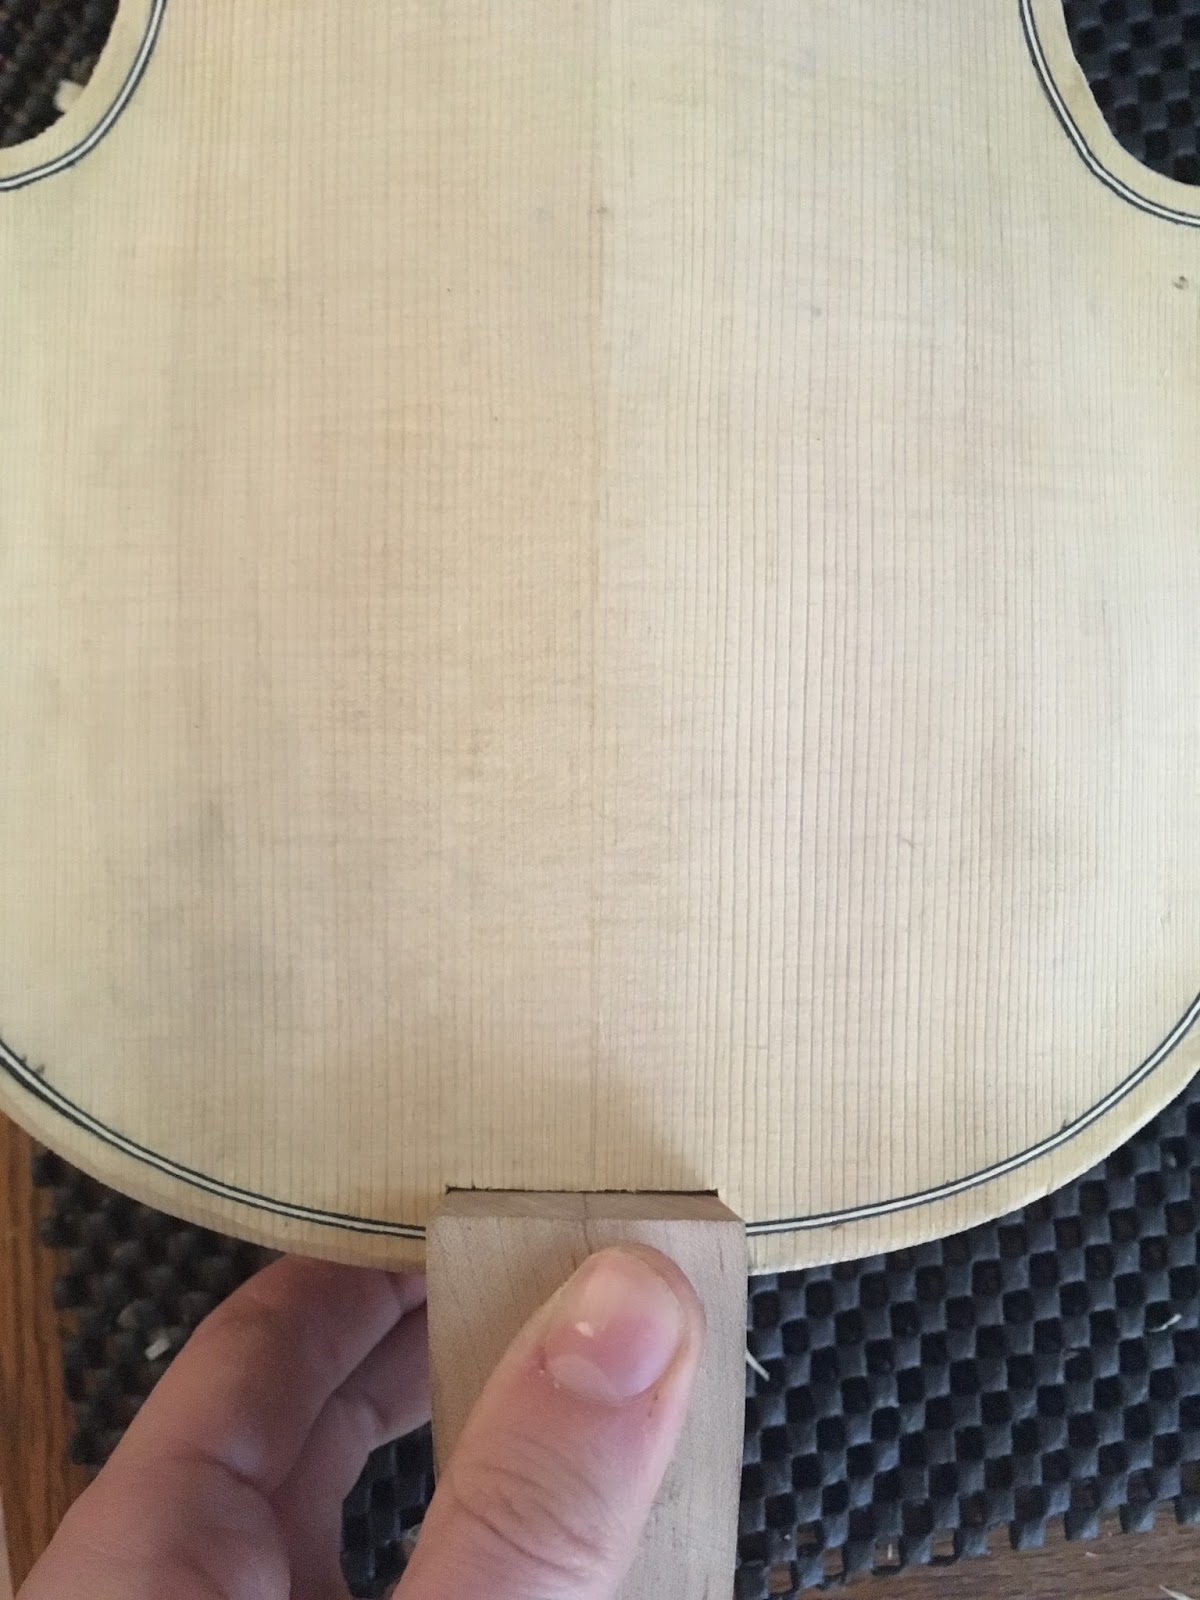
Dry fit at every turn. You have to juggle and balance all these variables and angles. Don't go more than a couple minutes without checking.
\
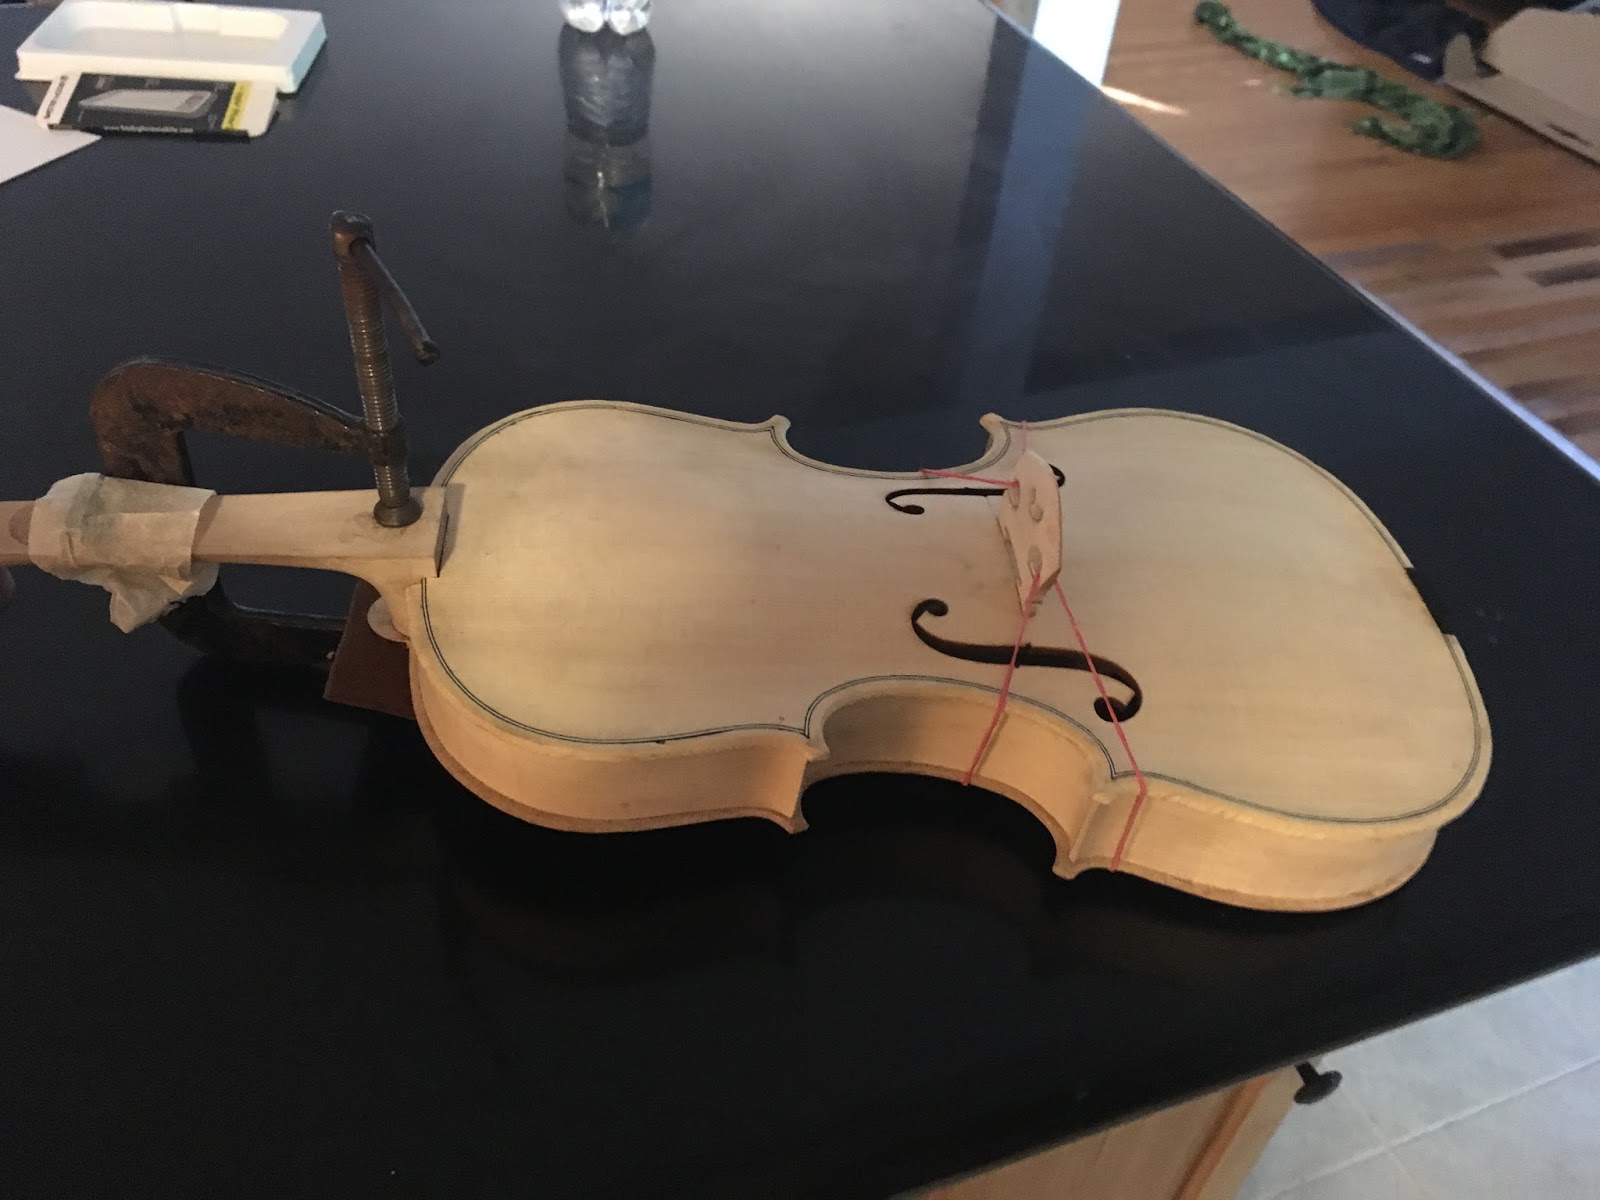
Here it is glued with nice thick glue. I checked the angle after clamping to make sure it was still correct.
As ugly as my very first mortise looks, it is actually the right angle (vertically at least), and the join feels solid. We're aiming for playability, so, I'm calling it a win. It was close, but I won. You will too.
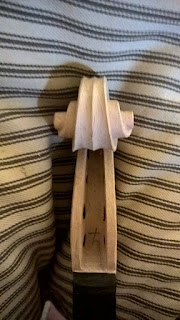
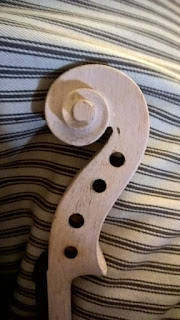
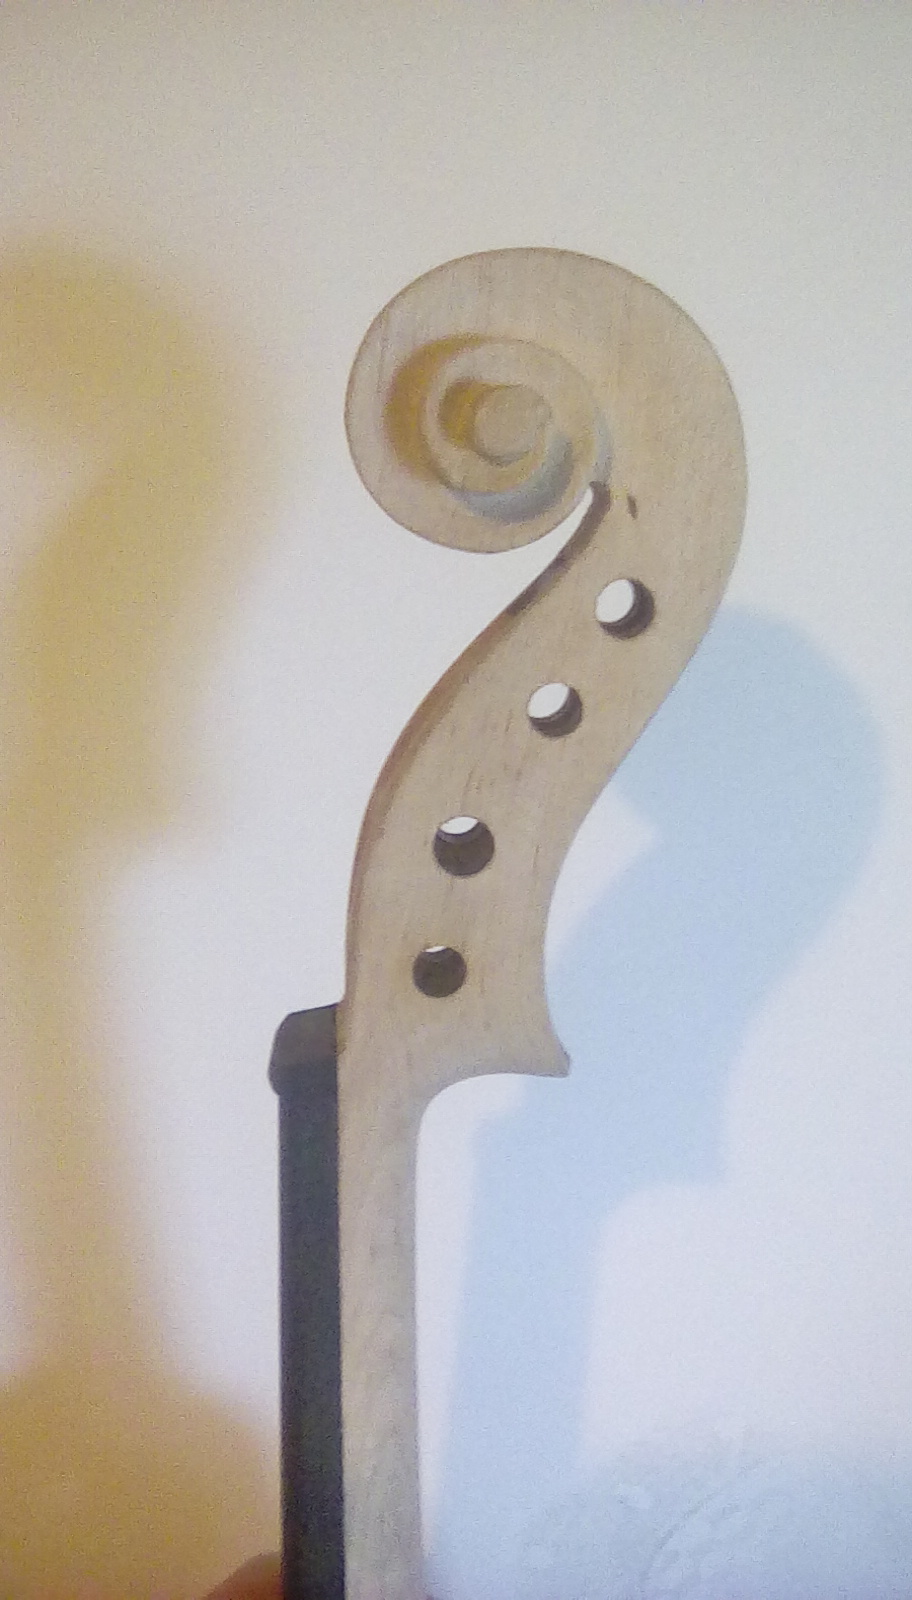
Pegbox and heel finishing
The neck is much more unwieldy to carve with a violin attached, so I did as much work to it as possible before setting it.
The pegs that came with the kit were, mercifully, already reamed and drilled.
I ordered a full rosewood fitting set but the pegs, alas, are not reamed or drilled, and though I may yet fit them, I am too impatient to do it now. I have very little patience for pegs in general; they were probably fine for gut strings in a baroque setup, but for modern steel/synthetic strings they are far from ideal. Something shouldn't have to be perfect to work at all, or it's a bad design! I want some Pegheds or Knillings, but not out of the gate for an experimental instrument.
The ebony pegs that came with the kit needed only a bit of sanding, and the holes enlarged for my very fat toddler cello strings. I then carved out the bottom of the pegbox to accomodate those same fat strings. It was exceedingly awkward to get to with exacto knives, and I broke two before I gave up and broke out the chisels, the use of which henceforth I have entirely avoided.
On the other end, the heel, I carved away the excess to allow for a 7mm deep mortise and a button diameter that now, in hindsight, seems a bit small. It looks very odd, like a cartoonishly miniscule nose in the center of a normal face. The button is rather structurally important, so I regret this. I read that many good makers carve out the heel curve a little extra to allow for greater ease in reaching higher positions, so I did that, since it's no skin off my teeth to remove a little extra wood. However, I am no great musician and don't see myself needing that feature, well, ever.

eBay violin: on sniping
My husband wants an antique violin for Christmas. I set myself a budget of $125 to get him the best setup I possibly could, not including case or bow.
Buying a violin off eBay was the obvious choice. I asked the local music store if they had any broken old wrecks to sell for next to nothing, and he said oh yes, very many, but they are definitely not for sale because he palms them off to the local luthiers and sells them restored for $400; and he seemed annoyed that I asked.
So, to eBay I went, with the help of the sniping website Gixen to get the best price -- it submits your highest bid in the last 3 seconds of the auction, to avoid bidding wars. I used group bidding to avoid emotional attachments; I made a group of 6 auctions and the program canceled its scheduled bids on the others once it won one.
Before you start bidding, it may be educational for you to watch a test group of about 20 promising violins that you think you could get in your price range. Then watch the auctions end and note what they ended up selling for to get a realistic idea of what is attainable in your price range.
In the under-$100-vintage violin category, there is little to say about quality. They are almost a fungible commodity at this price range -- all interchangeable based on the limited information available on eBay. Make very sure that you are bidding on a full 4/4 violin; be willing to make repairs.
My one tip for winning is -- don't be afraid to bid on an auction with bad pictures and little information; you are more likely to get a deal there. If you count on doing repairs anyway, there's little to lose (if it is an antique made with proper wood, not a Chinese plywood thing). I think I got a great deal by doing this, since I paid less than $100 for a violin with all the parts, with appearances of being even in playable condition; but we'll see when it comes in the mail!
Thursday, October 13, 2016
Gluing the body
Basically, I followed the directions on makingtheviolin.com.I used the scroll clamps and kitchen glue pot from previous posts.
I only clamped the corners before starting to glue.

Here it is all set up next to the stove.

I dipped a brush in the hot water in the kettle to clean up excess glue and wiped with a paper towel.

I only clamped the corners before starting to glue.

Here it is all set up next to the stove.
I dipped a brush in the hot water in the kettle to clean up excess glue and wiped with a paper towel.

That wasn't hard at all! Putting the top on wasn't hard either, although I had to use some pressure to counteract some asymmetrical bowing of the ribs, and the end result therefore was not an ideally even margin all the way around. It is annoying that my best effort is still imperfect.
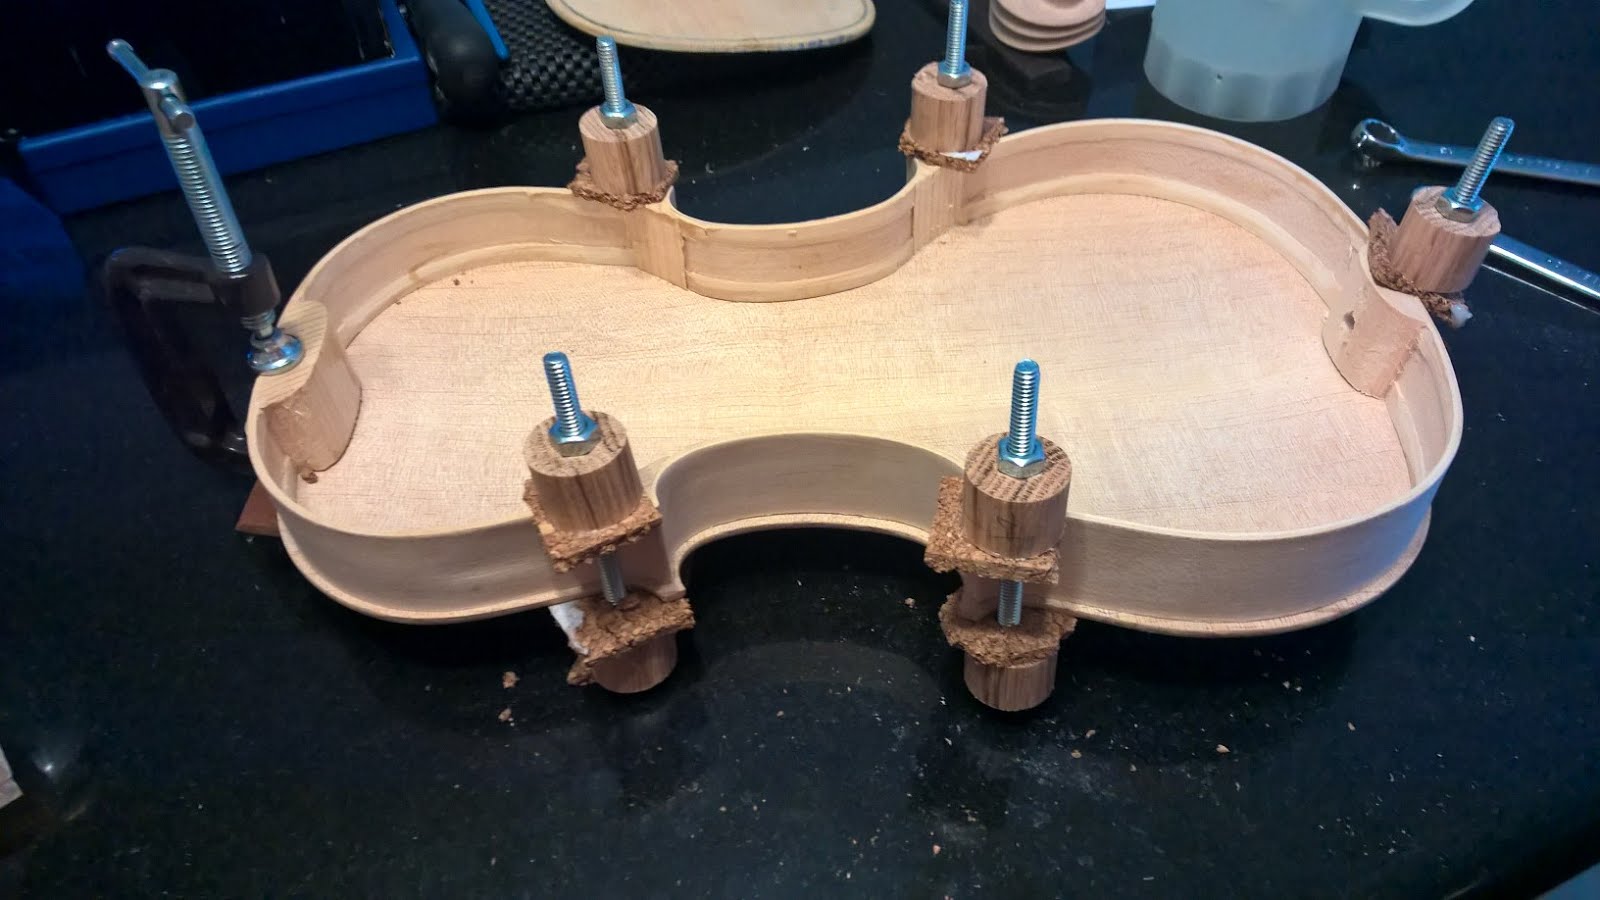
Spool clamps
Spool clamps are so simple and there must be three dozen tutorials out there at least.
I bought 1 inch oak dowel, 4.5" 1/4 bolts, and regular nuts. Most of the tutorials show butterfly nuts, but using a wrench to tighten is not onerous! I guess you run more of a risk of over-tightening when using a wrench, but use common sense. The fat cork layer I used (3/8 inch thick or so) absorbed a lot of over-tightening potential anyway. It also absorbed the crookedness in my hand-drilled spools. (If you have a drill press, now would be the time to use it.)
If I had to do it over again I would use wider dowel. The 1 inch felt pretty skimpy. I don't know if the hardwood dowel was strictly necessary either -- I think you could get away with a wider width of poplar/pine regular dowel, if budget is tight.

Honest workspace
I mostly work on my kitchen counter with a little lamp. The good thing about violins is that they don't take up much room so you don't need a huge workspace.


Monday, October 3, 2016
Kitchen-edition glue pot
I used a small glass jar with lid, pipe cleaners, a tea kettle, and my stove. Since I work in the kitchen anyway it seemed only logical.

For medium strength glue I used 1 tsp Behlen hide glue and 3 tsp water. Let it dissolve at room temp before suspending it in the water in the tea kettle and warming it up, slowly. Be careful not to cook it, but just barely melt it. My lowest burner setting works fine. I don't know why the burner is set to high in the picture, ignore that!

If you want to save the hide glue for your next gluing session, you may be able to do that by clapping the top on very soon after finishing gluing and sticking it in the fridge immediately. It may grow mold if you leave it too long though.
Scroll
The machine-carved scroll was fat, perfectly symetrical, and lacking concavity of any sort. I added another 1/4 turn to the volute, added concavity to the sides, and re-chamfered the edges according to the directions and pictures on makingtheviolin.com and this blog post by Manfio: http://www.violinist.com/blog/manfio/20096/10261/
Before:
After:


Before:


After:

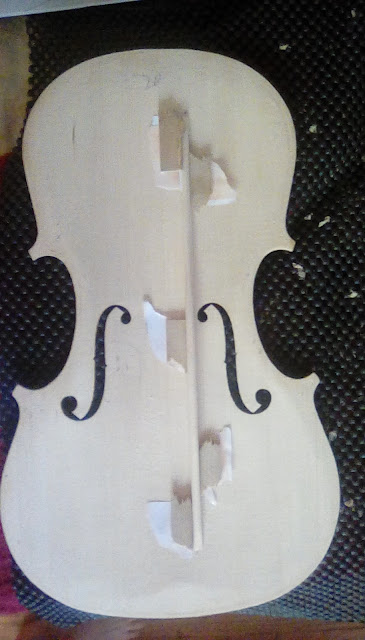
Bass bar install using bamboo clamps
The bass bar fitting started off poorly when I decided to use the loose blue chalk I have (for a chalk line) for marking. It did not work at all for marking and it permanently stained the entire plate. Sigh. What was I thinking?
The bass bar came rather too tall, I thought, so I trimmed it down with the scraper. It fit the inside pretty well from the beginning however. There was a bit of spring in it. If I were making it from scratch I wouldn't put in spring, but whatever. The Lowes-blue spruce was making me a bit frazzled.
I only have 2 C-clamps. Some forum post showed some clothespin style clamps but they needed to be made from a springy wood, which describes nothing I had on hand. I walked in and out of the garage knowing nothing was in there, when I noticed this bamboo stick propped up next to the door and splitting on the end. My kids like to poke things and shoot each other with it. Aha! I split the bamboo down to the joint and had three clamps in about 60 seconds. They worked perfectly.

Medium-strength hide glue worked fine. The cleats are MDF glued with weak Elmer's white glue onto paper onto the plate. Next time, I would use cleats again but attach them some other way, and obviously skip the stupid blue chalk dust.
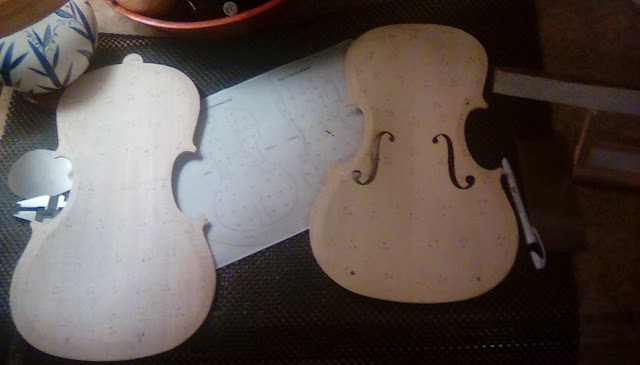
Graduating the plates
I used this thin viola reverse graduation scheme. The people on maestronet had concerns it was too thin so I figured this was the one I wanted.
My rationale was as follows: the risk of too thin is structural integrity and harsh, too bright sound. Too bright fiddles work well as octaves because more resonance is a good thing to bring responsiveness to bass notes. And structural integrity didn't concern me because it is just a prototype, not something I am selling with my name on it to someone to last for 100 years. However, I took it too thin in one spot during tap-tuning it and it may very well pop like a grape when I string it up, so this was probably a mistake.
http://www.maestronet.com/forum/uploads/monthly_12_2014/post-77209-0-55870100-1417934982.jpg
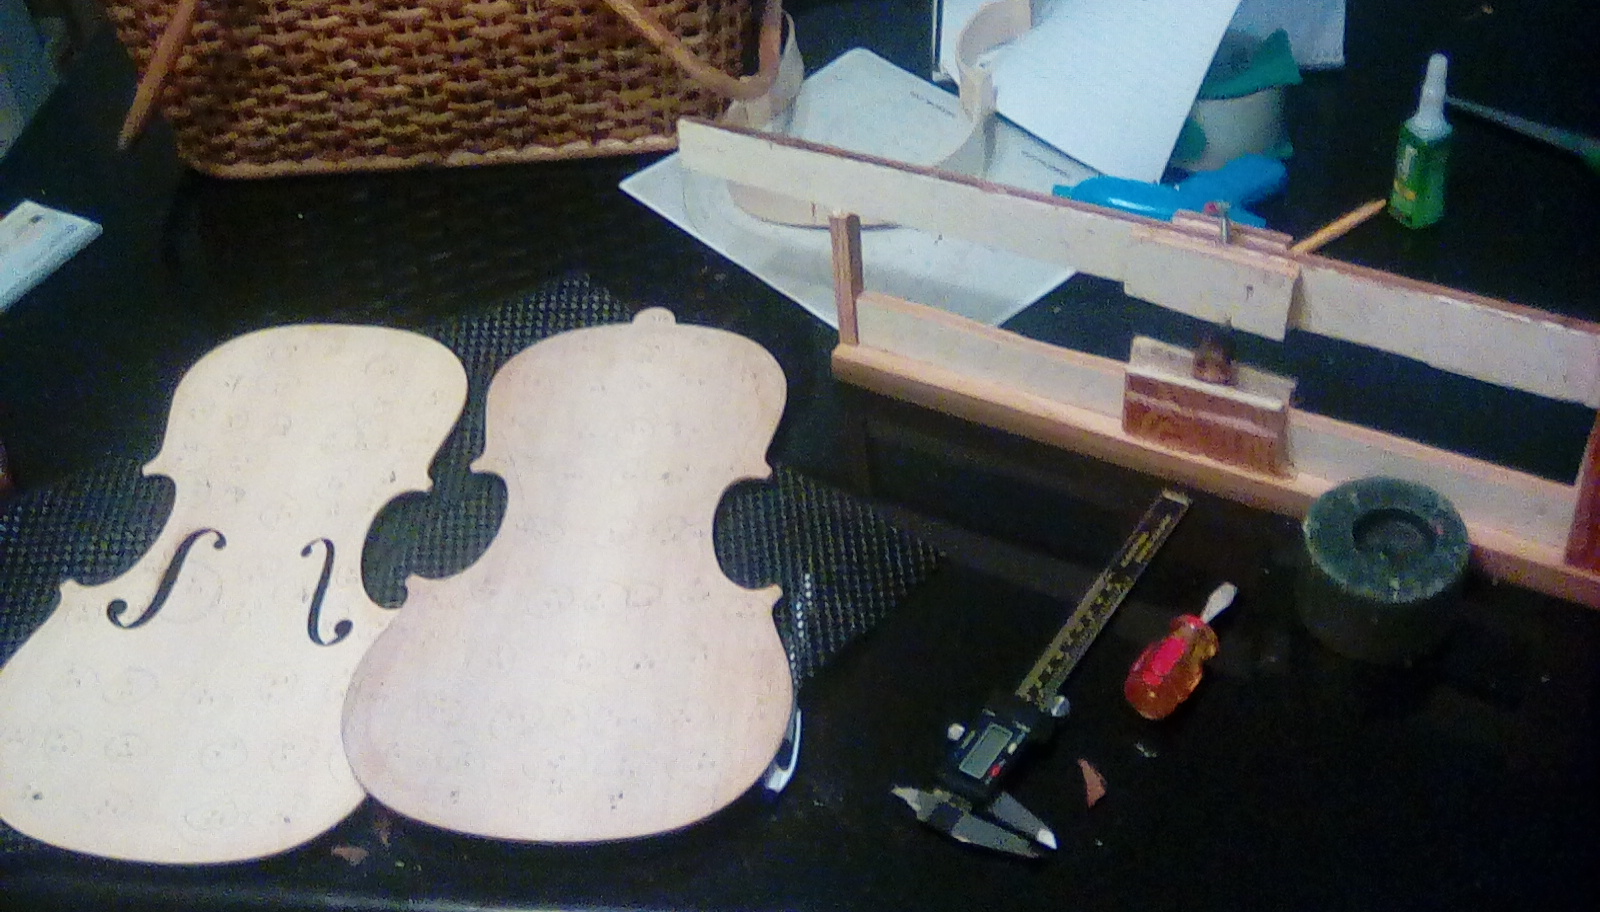
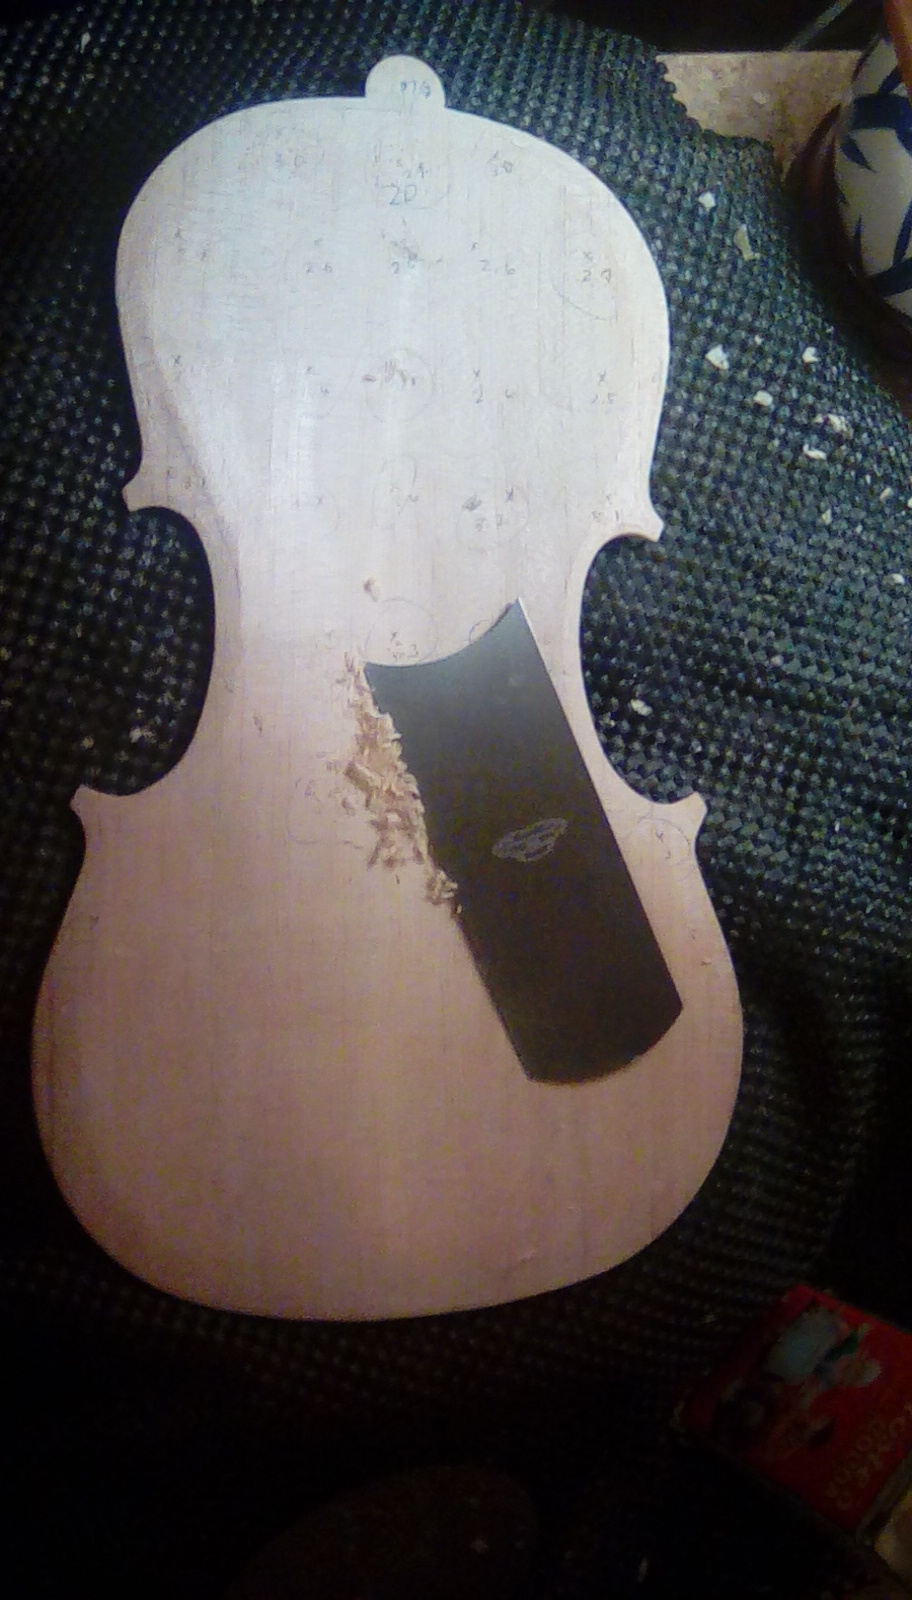
Before carving, I marked the plates with this Strad style punch marker, detailed in the last post:

I used the Strad punch from the earlier post and graduated aggressively, leaving a thick spot in the soundpost area. I held it to the light to eliminate thick spots.

Then I attempted to tap-tune it, simply, just Mode 2 and 5 to start out with. I used mostly platetuning.org info and the free program Audacity. I did this on a laptop using just the built-in mic. When thinning according to his diagram of where to thin wasn't working well, I clicked through to his original sources on where to thin to affect which modes, and used those sources instead:
http://www.platetuning.org/html/modes_-_tuning_plates.html
That's when I almost scraped a hole straight through the belly. It is bad, but in my ignorance I am not sure how bad. It is about 1.9 mm. Maybe a little less. If you pinch the thin spot you can feel your other finger through it.
Even so, I was unable to bring it exactly to the appropriate frequencies.
I began with:
Belly M2 206 Hz
Belly M5 354 Hz
Back M2 182 Hz
Back M5 408 Hz
I settled for:
Belly M2 196 Hz (should be 177 Hz)
Belly M5 354 Hz
Back M2 176 Hz
Back M5 366 Hz
Next time, I will be much more conservative and tap tune much earlier in the graduation process.
My rationale was as follows: the risk of too thin is structural integrity and harsh, too bright sound. Too bright fiddles work well as octaves because more resonance is a good thing to bring responsiveness to bass notes. And structural integrity didn't concern me because it is just a prototype, not something I am selling with my name on it to someone to last for 100 years. However, I took it too thin in one spot during tap-tuning it and it may very well pop like a grape when I string it up, so this was probably a mistake.
http://www.maestronet.com/forum/uploads/monthly_12_2014/post-77209-0-55870100-1417934982.jpg

Before carving, I marked the plates with this Strad style punch marker, detailed in the last post:
I used the Strad punch from the earlier post and graduated aggressively, leaving a thick spot in the soundpost area. I held it to the light to eliminate thick spots.
Then I attempted to tap-tune it, simply, just Mode 2 and 5 to start out with. I used mostly platetuning.org info and the free program Audacity. I did this on a laptop using just the built-in mic. When thinning according to his diagram of where to thin wasn't working well, I clicked through to his original sources on where to thin to affect which modes, and used those sources instead:
http://www.platetuning.org/html/modes_-_tuning_plates.html
That's when I almost scraped a hole straight through the belly. It is bad, but in my ignorance I am not sure how bad. It is about 1.9 mm. Maybe a little less. If you pinch the thin spot you can feel your other finger through it.
Even so, I was unable to bring it exactly to the appropriate frequencies.
I began with:
Belly M2 206 Hz
Belly M5 354 Hz
Back M2 182 Hz
Back M5 408 Hz
I settled for:
Belly M2 196 Hz (should be 177 Hz)
Belly M5 354 Hz
Back M2 176 Hz
Back M5 366 Hz
Next time, I will be much more conservative and tap tune much earlier in the graduation process.
Strad-style graduating tool; marking
We know from marks on his instruments and shop notes that Stradivari used a graduation punch like this one to measure how thick/thin to graduate his plates. At least, so we're told in this maestronet thread, with directions to make a punch like this.
http://www.maestronet.com/forum/index.php?/topic/329084-video-on-strad-graduation-punch/page-2
https://www.youtube.com/watch?v=LLNAsAr59ws
I thought that looked feasible. Low-tech solutions can work really well.
Shop-made tools are supposed to be a show of workmanship. But they can also be makeshift. I have three tiny children who make it exhausting to get to Home Depot so I seized the day (rather, the naptime) and just used scrap plywood and a bolt I found in the garage. For the hinge I used the wooden handle tip of one of my kid's paint-brushes. Everything is put together with white wood glue.
To sharpen the bolt, I used a poor-man's-lathe. I tightened the chuck of the drill around the bolt head and C- clamped the drill to the bench. I pressed a file against the revolving bolt and hey presto, a sharpened bolt. Before you protest that a sharpened bolt is just a screw, remember that the close spacing of the threads is a plus here for minute adjustments. Some bolts have the screws calibrated for mm -- a quarter turn equals a mm or something like that -- to such a precise degree that astronomers use them in telescopes.
My screw didn't seem to have that, but it still worked. It worked quite well indeed. I used my Harbor Freight calipers to set the clearance between the leather pad (not pictured) and the tip of the screw, poked all the spots of the plates that were supposed to be that thickness, and then tightened it to the next smaller thickness and so on. It took about five to ten minutes to mark the plates.

Arching the plates
The machine-carved arching roughly corresponded to Messiah templates, sans fluting. It was basically half-finished arching that could be made to comply to the templates with more wood removed. That was a pleasant surprise.
 Fluting directions are in Michael Darton's book in the edges chapter at violinmag.com.

I cleaned it up with scrapers, by eye using dim lighting at an angle, by feel with my hands. Then I did a rough marking of the arches using an embarrassingly makeshift technique that still helped.
Normally, arching is usually marked and completed before the plates are hollowed out underneath, so you have a flat surface to mark from. At least, it appears most marking jigs use this, and therefore you have to improvise when doing a kit. Ideally, you could clamp a pencil in a router or drill press and slide the plate around on a piece of MDF. But I don't have one yet, so I clamped the pencil to the overhang of the toe-kick ledge of my kitchen island and slid the plate around on the floor to mark it. It looked ridiculous but it worked.

Use a light hand when you mark -- start with the maple back to practice on -- because if you aren't careful you can gouge and stain the spruce. In fact, use a light hand on the spruce in general especially when using the scraper, to avoid tear-out. Using the scraper almost feels more like brushing away crumbs of wood than carving. Be gentle.
Edit: I should have followed the templates more carefully. So much emphasis is put on graduation, but Strads have been regraduated and still sound so amazing -- arching however can't be changed (besides sinking with time) so that must be more influential than the interior graduation. And yet many makers practically eyeball it, as I mostly did here. Just use a mathematically optimized cycloid template, not an exact transcription of an already-sunken Strad. The making the violin templates do compensate which is good.

 Fluting directions are in Michael Darton's book in the edges chapter at violinmag.com.
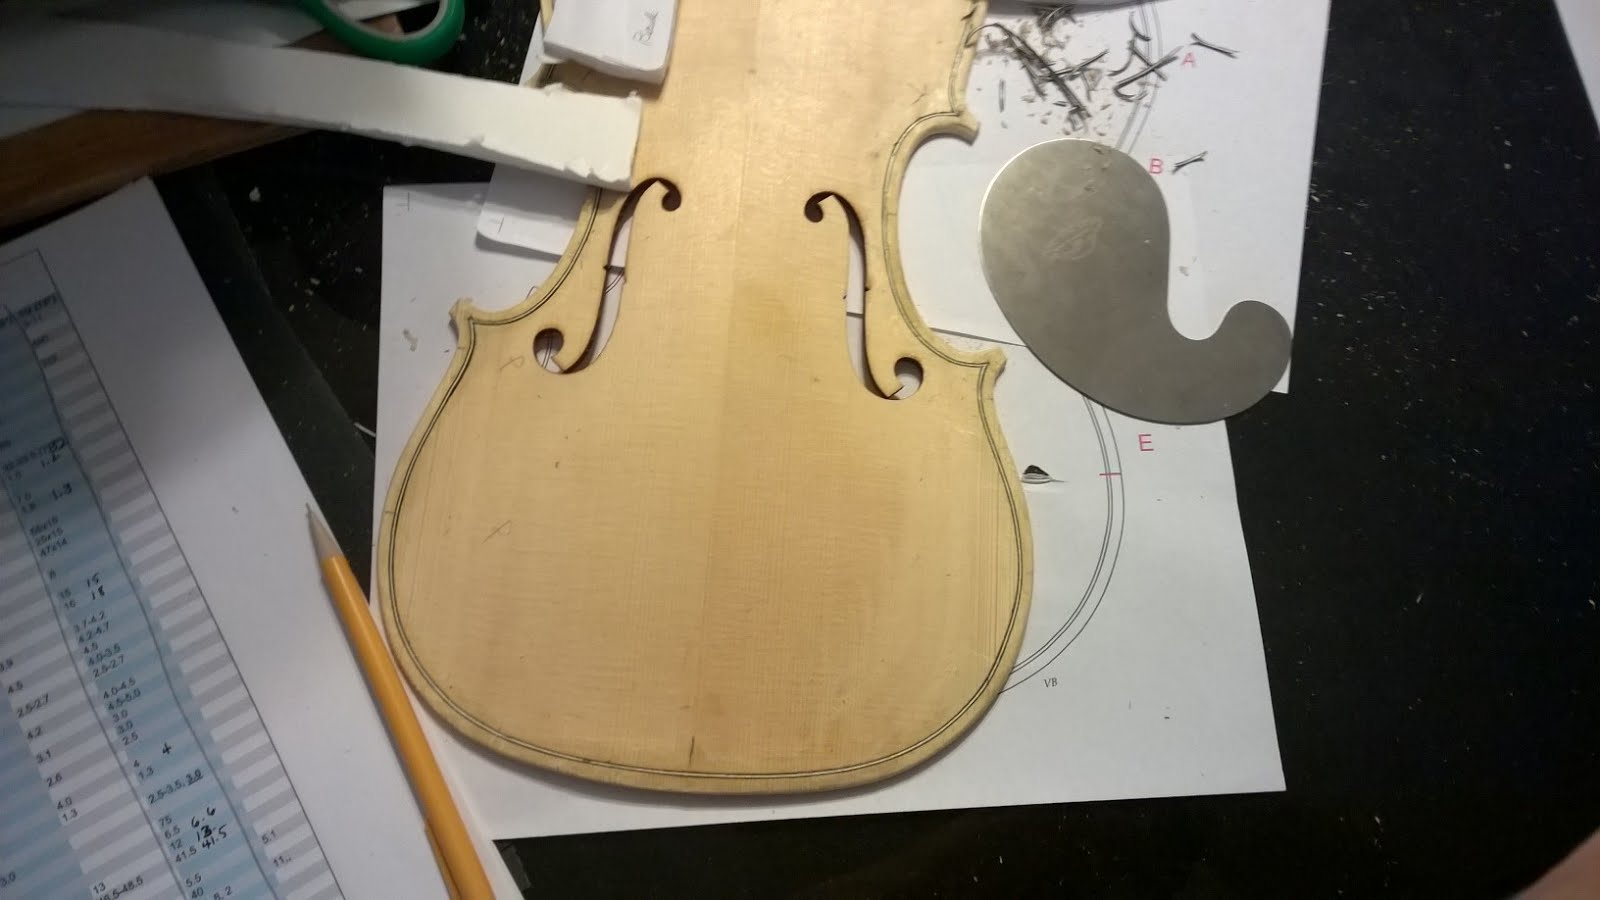
I cleaned it up with scrapers, by eye using dim lighting at an angle, by feel with my hands. Then I did a rough marking of the arches using an embarrassingly makeshift technique that still helped.
Normally, arching is usually marked and completed before the plates are hollowed out underneath, so you have a flat surface to mark from. At least, it appears most marking jigs use this, and therefore you have to improvise when doing a kit. Ideally, you could clamp a pencil in a router or drill press and slide the plate around on a piece of MDF. But I don't have one yet, so I clamped the pencil to the overhang of the toe-kick ledge of my kitchen island and slid the plate around on the floor to mark it. It looked ridiculous but it worked.

Use a light hand when you mark -- start with the maple back to practice on -- because if you aren't careful you can gouge and stain the spruce. In fact, use a light hand on the spruce in general especially when using the scraper, to avoid tear-out. Using the scraper almost feels more like brushing away crumbs of wood than carving. Be gentle.
Edit: I should have followed the templates more carefully. So much emphasis is put on graduation, but Strads have been regraduated and still sound so amazing -- arching however can't be changed (besides sinking with time) so that must be more influential than the interior graduation. And yet many makers practically eyeball it, as I mostly did here. Just use a mathematically optimized cycloid template, not an exact transcription of an already-sunken Strad. The making the violin templates do compensate which is good.

Subscribe to:
Posts (Atom)